Styling, modeling, photographing, promoting – as a blogger, one can slip into many different roles. Since I always receive a ton of questions on how long I need to prepare a blogpost, who takes my photos, and which camera I use, I decided to write an article where I give you a glimpse behind the scenes of a fashion blogger. I try show you step by step how I create an outfitpost and what you should consider.
Step 1: The Preparation
Preparation is really important! Especially when I work on very extensive blogposts like the article about the fashion in the movie “Their Finest”, I need a lot of time to plan and arrange everything. First of all, I think about the outfits I want to show. When I have a plan what kind of looks would work for the post, I start searching the world wide web for online shops which offer the clothes I want. If I find something that would match, I usually get in contact with the brand and ask if they want to be part of my blog post. As it takes some time until I receive the answers and even longer until I receive the outfits, it’s important to start early enough with planning an outfitpost. When I have all my outfits together, I start stalking the weather forecast and plan the photo shoot.

Step 2: Styling the Outfits
This part is definitely my favourite part! I could spend hours styling different outfits and teaming them with matching accessories. As soon as I put an outfit together, I hang them on a clothes rail to make sure I won’t miss something important like shoes, e.g.
Step 3: Searching for an Location
When I know what I’m going to wear, I start searching for a matching location. By now, even our friends and parents help us. If they spot a nice place for photo shoots, they immediately tell us – pretty nice of them, right? 😉

Step 4: The Styling
When we have our location and outfits together, I think about the styling. I usually do hair and makeup by myself. Depending on the outfit, I wether do a very authentic vintage styling, or try to add a modern touch to my retro outfits, like I did here.
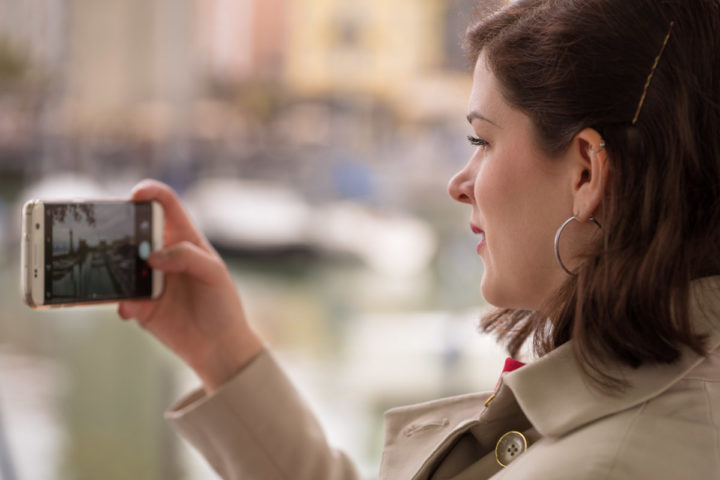
Step 5: The Photo Shoot
I’m lucky enough to have a boyfriend who also is a passionate photographer (find his website here). Sometimes, we find someone who helps us a bit with lighting etc., but usually it’s only us two. By now, we are rather experienced and get through a photo shoot quite quick. However, not every photo is good enough to be published in an outfitpost as you can see in my bloopers here and here.
Depending on the amount of outfits we have to photograph and the lighting, we need between 45 minutes up to several hours to finish a photo shoot. Martin uses the Sony Alpha 7s, while I’m photographing with the Sony Alpha 6300
.

Step 6: Retouching
I’m so thankful Martin does almost all the retouching for me. I’m getting better, but I’m still not a pro when it comes to editing images, which means I would need a lot of time if I had to do it by myself. We avoid changing the photos drastically and only do things like adjusting the contrast or lighting, and charm away my spots if I have some, of course. 😉 By the way: Martin almost always uses Adobe Lightroom and just very rarely Photoshop.

Step 7: Writing and Translating
Step six and seven normally run in parallel. While Martin is doing the retouching, I’m writing the blogpost. Furthermore, I link to the featured items or try to find similar products, if the original pieces are no longer available. I also mark all gifted items with “c/o” or “*PR-Sample” and always tell you if a blogpost is sponsored.
As soon as I finished the German version, I translate the text into English. Linguee is my best friend here. It’s hard to believe how many words I still don’t know after learing English for so many years. 😉
Step 8: Inserting the Photos and Proofreading
After finishing the text, I insert the photos and read the outfitpost at least two times before I hit “publish” or “schedule”. I usually write all my blogposts in advance and plan them afterwards as I don’t have time to blog everyday. And of course I don’t get up at 6 am just to publish an article. 😉
Step 9: Promoting, promoting, promoting
Step nine isn’t really part of creating an outfitpost, however, this step is quite important as well. If I don’t promote my blogpost, a lot of my readers and followers wouldn’t notice that there is something new up on my blog.
I automated my newsletter, so I can’t forget to send it. If there is a new post up on RetroCat.de, usually the first thing I do in the morning is posting a picture on Instagram with the hint that a new outfit is online. In the afternoon, I normally post a link to the blopost on Facebook and pin some photos on Pinterest. Furthermore, I share a link to the outfitpost on Twitter. If possible, I tag all the featured brands on my social media accounts, and if the blogpost is a collaboration, I send my coopearation partners a link to the article.

As you can see, there is much work behind an outfitpost. However, I can’t tell you how long I need for all those steps. It always depends on the type of post and circumstances. Sometimes, I don’t need more than three or four hours, sometimes one day isn’t enough to finish everything. But as blogging is so much fun for me, it usually doesn’t really feel like work. 😉
Now, I would like to know if you enjoyed this kind of blogpost? If so, I will try to publish more blog tips and behind the scenes posts. Just leave me a comment with your feedback, if you want.


